Pav Bhaji Recipe (Spiced Mashed Vegetable Curry with Buttered Bread)
Pav bhaji is a much-loved street-food dish originating from Mumbai, featuring a thick, spiced vegetable mash cooked on a flat griddle and served with butter-toasted soft bread rolls known as pav.
This version relies on a dependable combination of potatoes, cauliflower, green peas, and tomatoes simmered until tender, then thoroughly mashed together with a robust blend of garlic, ginger, and store-bought pav bhaji masala.
Why This Recipe Works
- Boiling and then mashing a mix of starchy potatoes and fibrous vegetables like cauliflower creates a naturally thick base without needing heavy cream or flour.
- Cooking the finely chopped onions, capsicum, and tomatoes in a mix of butter and oil prevents the butter from burning while keeping the rich flavor intact.
- Adding part of the pav bhaji masala directly to the simmering vegetables and reserving a pinch to stir in right before serving builds layers of warm spice aroma.
Ingredient Notes
- Pav Bhaji Masala: This distinct spice blend gives the dish its signature aroma. Look for it in the spice aisle of any South Asian grocery store or well-stocked international supermarket.
- Pav (Bread Rolls): Soft white dinner rolls or slider buns work best. They are meant to be split and toasted generously in butter until golden.
- Kashmiri Red Chili Powder: Used primarily to give the bhaji a vibrant reddish color without adding excessive heat. Regular mild chili powder is a fine substitute.
If You’re Cooking Outside India
- Pav Bhaji Masala: If you cannot find this specific spice blend, a close approximation is a mix of equal parts garam masala, ground coriander, and a pinch of amchur (dry mango powder) or chaat masala.
- Pav: Standard American dinner rolls, Portuguese sweet rolls, or soft slider buns make excellent substitutes for Indian pav.
How to Make Pav Bhaji
Boil the Vegetables
Simmer the diced potatoes, cauliflower florets, and green peas in salted water until completely tender and easily pierced with a fork.
Prepare the Masala Base
Sauté finely chopped onions, capsicum, and ginger-garlic paste in a combination of butter and oil until soft, then cook down the chopped tomatoes until they break down into a paste.
Mash and Simmer
Drain the boiled vegetables, add them to the tomato-onion base, and use a sturdy potato masher to blend everything into a thick, uniform texture before simmering with water.
Finish and Toast
Stir in a final pat of butter and fresh coriander leaves, then toast the split bread rolls on a hot pan until buttered and golden brown.
Cooking Tips
- Mash the vegetables thoroughly while they are still hot so they blend smoothly into the gravy without lumps.
- Adjust the consistency of the bhaji with small splashes of hot water as it simmers, keeping it thick enough to scoop up with bread.
Common Mistakes to Avoid
- The bhaji turns out too watery: Simmer the mixture uncovered over medium heat for a few extra minutes, allowing excess moisture to evaporate while stirring frequently.
- The butter burns quickly during the initial sauté: Always combine butter with a small amount of neutral cooking oil, which raises the smoke point and prevents the butter solids from scorching.
Variations
- Cheese Pav Bhaji: Top the hot bhaji with a generous layer of grated processed cheese or cheddar just before serving, letting it melt into the spiced vegetable mixture.
Serving Suggestions
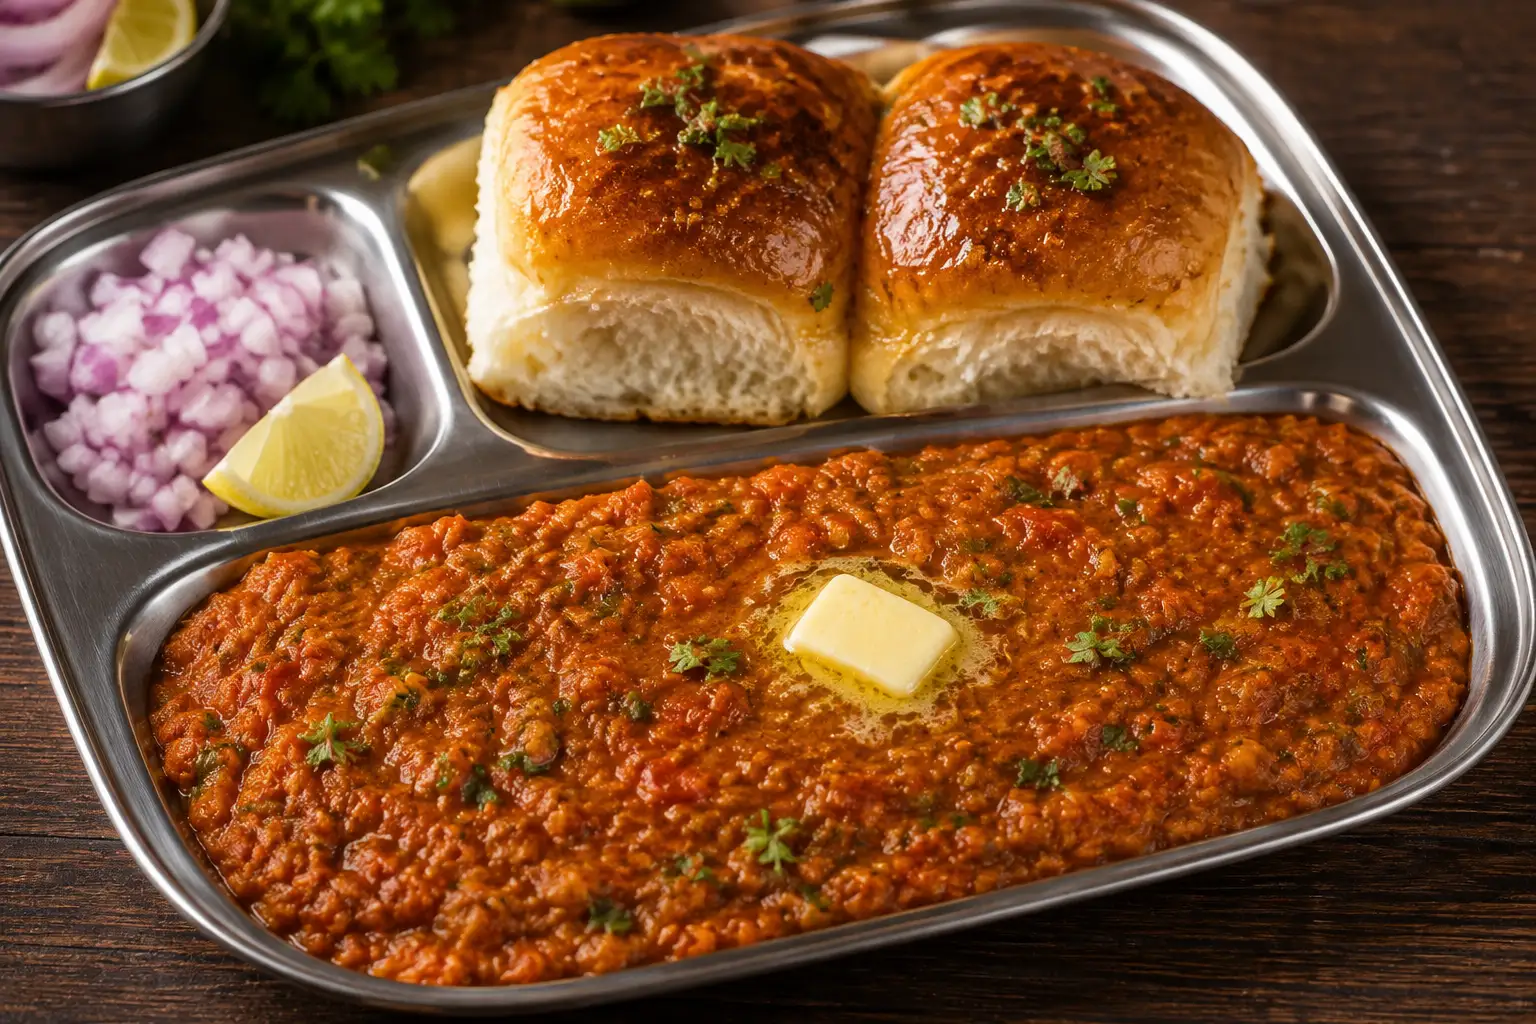
- Serve hot bhaji in shallow bowls with a generous pat of butter on top.
- Accompany with butter-toasted pav, finely chopped raw onions, and lemon wedges for squeezing over the top.
Storage & Make-Ahead
Make ahead: The bhaji can be cooked a day in advance and kept covered in the refrigerator.
Refrigerate: Store leftover bhaji in an airtight container in the refrigerator for up to 3 days.
Freeze: Freeze the bhaji without fresh coriander garnish for up to 2 months in a freezer-safe container.
Reheat: Thaw overnight in the refrigerator if frozen, then reheat on the stovetop over medium heat, adding a splash of water and fresh butter to restore its texture.
Frequently Asked Questions
Can I make pav bhaji without a potato masher?
Yes, you can use the back of a sturdy metal spatula or a heavy-bottomed glass to mash the vegetables against the side of the pan.
What can I use instead of pav bhaji masala?
While it changes the flavor profile slightly, you can substitute a mix of equal parts garam masala and ground coriander with a pinch of amchur powder.
How do I store leftover pav bhaji?
Store the bhaji in an airtight container in the refrigerator for up to 3 days. Reheat on the stovetop with a splash of water and butter.
More Indian Recipes to Try
Browse the IndiPlated recipe index
Pav Bhaji
Ingredients
Equipment
Method
- Place the cubed potatoes, cauliflower florets, and green peas in a large saucepan. Cover with water, add a pinch of salt, and bring to a boil over medium-high heat. Cook for 12 to 15 minutes until all vegetables are fork-tender.
- Drain the cooked vegetables, reserving the cooking water. Using a potato masher, mash the hot vegetables thoroughly until smooth and uniform. Set aside.
- Heat 2 tablespoons of butter and 1 tablespoon of oil in a large skillet or kadai over medium heat. Add the finely chopped onions and sauté until translucent. Add the capsicum and ginger-garlic paste, cooking for 2 minutes until the raw aroma disappears. Stir in the chopped tomatoes, cooking until they soften and blend into a thick paste.
- Add 1 tablespoon of pav bhaji masala, Kashmiri red chili powder, and salt to the tomato-onion mixture. Stir well and cook for 1 minute. Add the mashed vegetables and 1 1/2 cups of water, mixing thoroughly to combine.
- Reduce the heat to medium-low and let the bhaji simmer for 10 to 12 minutes, stirring occasionally and mashing further with the back of a spoon. Adjust consistency with warm water if the mixture becomes too thick. Stir in the remaining 1 tablespoon of pav bhaji masala and half of the chopped coriander leaves just before turning off the heat.
- Slice the pav horizontal-wise without cutting all the way through. Melt the remaining butter on a hot griddle or pan, place the bread on the butter, and toast until golden brown on both sides. Serve hot bhaji topped with a pat of butter and remaining coriander, alongside toasted pav and lemon wedges.
Notes
Always serve the bhaji piping hot with freshly toasted buttered bread.